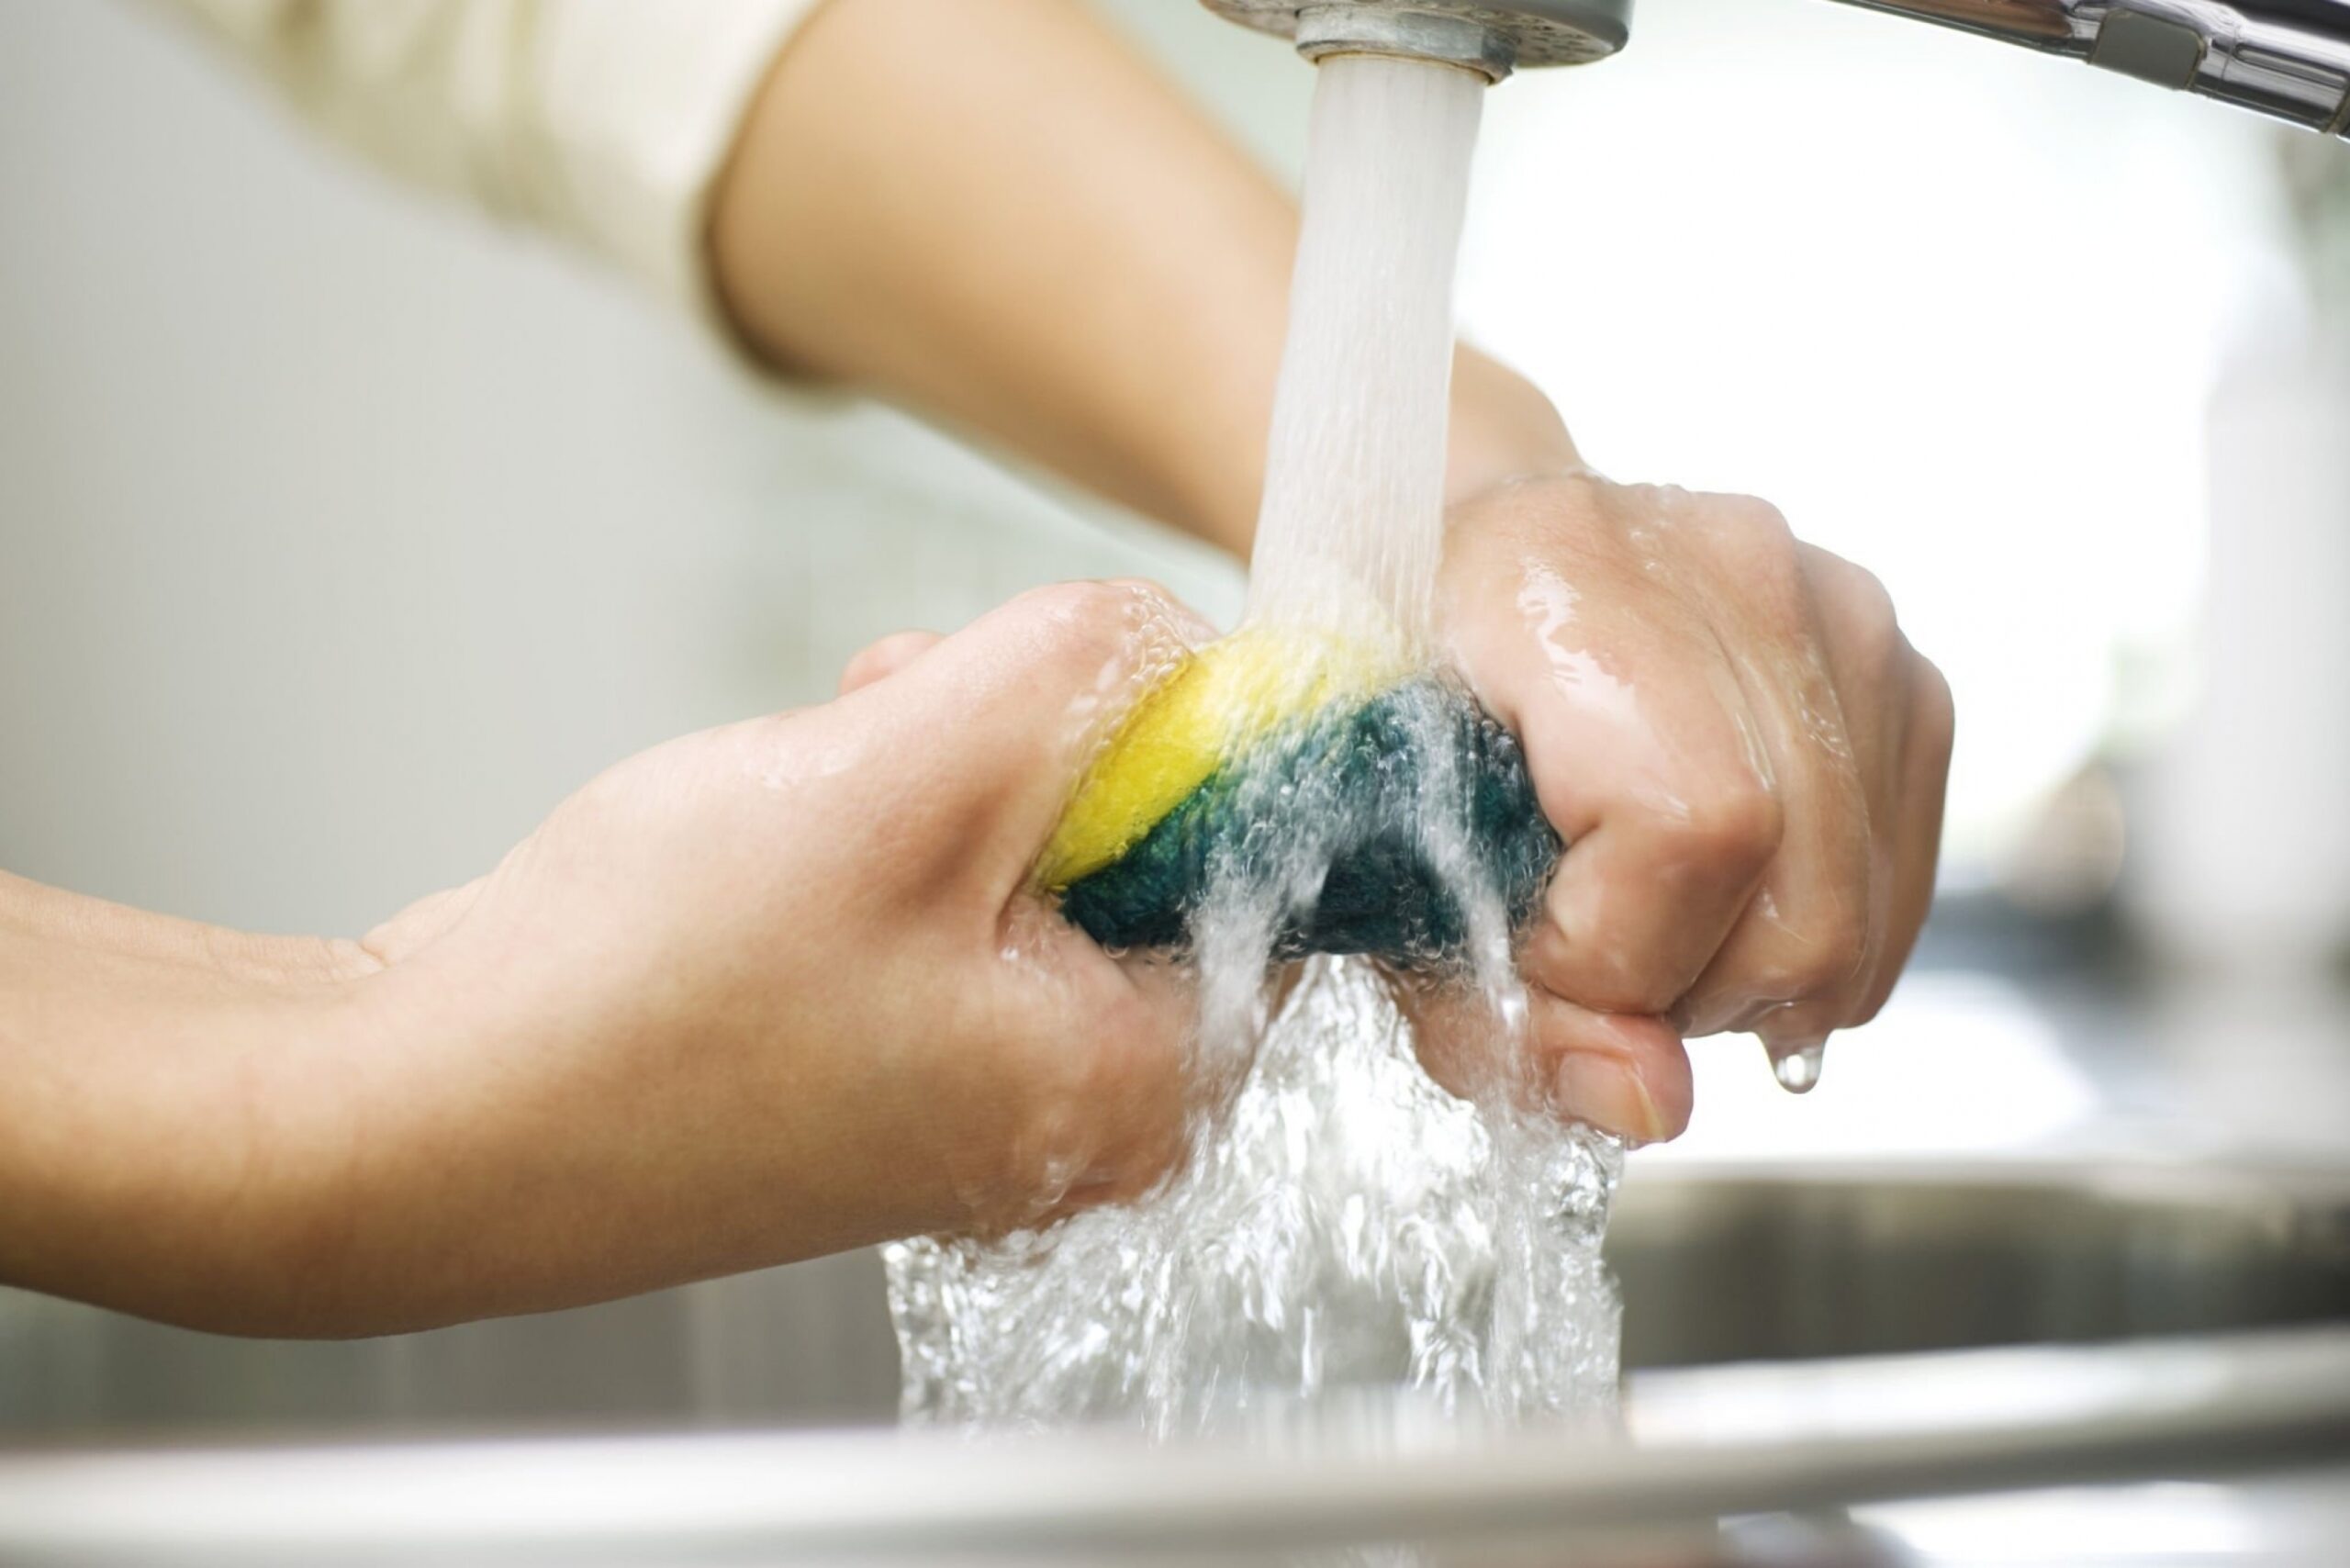
Sponges are a key utensil that nearly everyone has in their kitchen. They do the job of cleaning our dishes and wiping up any assortment of messes around the kitchen. But did you know that the thing that does the cleaning also needs to be cleaned?
Doing the dishes with the same dirty old sponge you toss in your sink between uses can actually do more harm than good. Below, we’ve compiled a few of our go-to methods for both keeping your kitchen sponge clean and killing the bacteria within it. Keep reading to find out just how easy the process can be.
Why Should You Clean Your Kitchen Sponge?
Kitchen sponges, while meant to clean, require fairly frequent cleaning themselves. But why is that? The pores within sponges can very easily trap and hold onto moisture and food debris, and this can breed bacteria and germs. Sponges require regular cleaning and disinfecting in order to kill the bacteria that can grow within them. Without cleaning them, when you use your kitchen sponge to clean your dishes and countertops and stove, you are spreading the bacteria and germs within the sponge. So how do you keep those cleaning utensils clean?
The Best Ways to Clean a Sponge
Below you’ll find a handful of methods you can pick and choose from to keep your kitchen sponge clean and sanitized between uses. Keep reading and try them for yourself to see what works in your home.
1. Vinegar
One of the best and most effective ways to clean and disinfect your kitchen sponge is by using household white vinegar. This method is super simple but effective! Here’s what to do:
- Fill a bowl with undiluted distilled white vinegar and then submerge your kitchen sponge in the bowl.
- Allow your kitchen sponge to soak in the vinegar for 5 to 10 minutes to clean, disinfect, and deodorize.
- Once your sponge has been left to soak, remove it from the vinegar then rinse it under hot water and wring it out. Leave it to dry for a few hours before using it again around your kitchen.
2. Bleach
If you’re looking for a more heavy-duty method for cleaning and disinfecting, bleach is the key. This is the best way to kill mold, bacteria, and mildew hiding in your sponge. Here’s how to create and use a bleach solution to clean your sponge:
- In a bowl, mix together 1 quart of hot water and ½ a teaspoon of bleach.
- Submerge your kitchen sponge in the solution, and allow it to soak for 5 to 10 minutes. This will allow the bleach time to disinfect and kill bacteria within the sponge.
- After the sponge has had time to soak, remove it and rinse it under hot water. Wring it out and allow it to fully dry before using it again.
Note: Vinegar and bleach both have very strong and pungent odors. Please make sure that when you use either of these methods that you do so in a well-ventilated area and protect your airways during the cleaning process.
3. Microwave
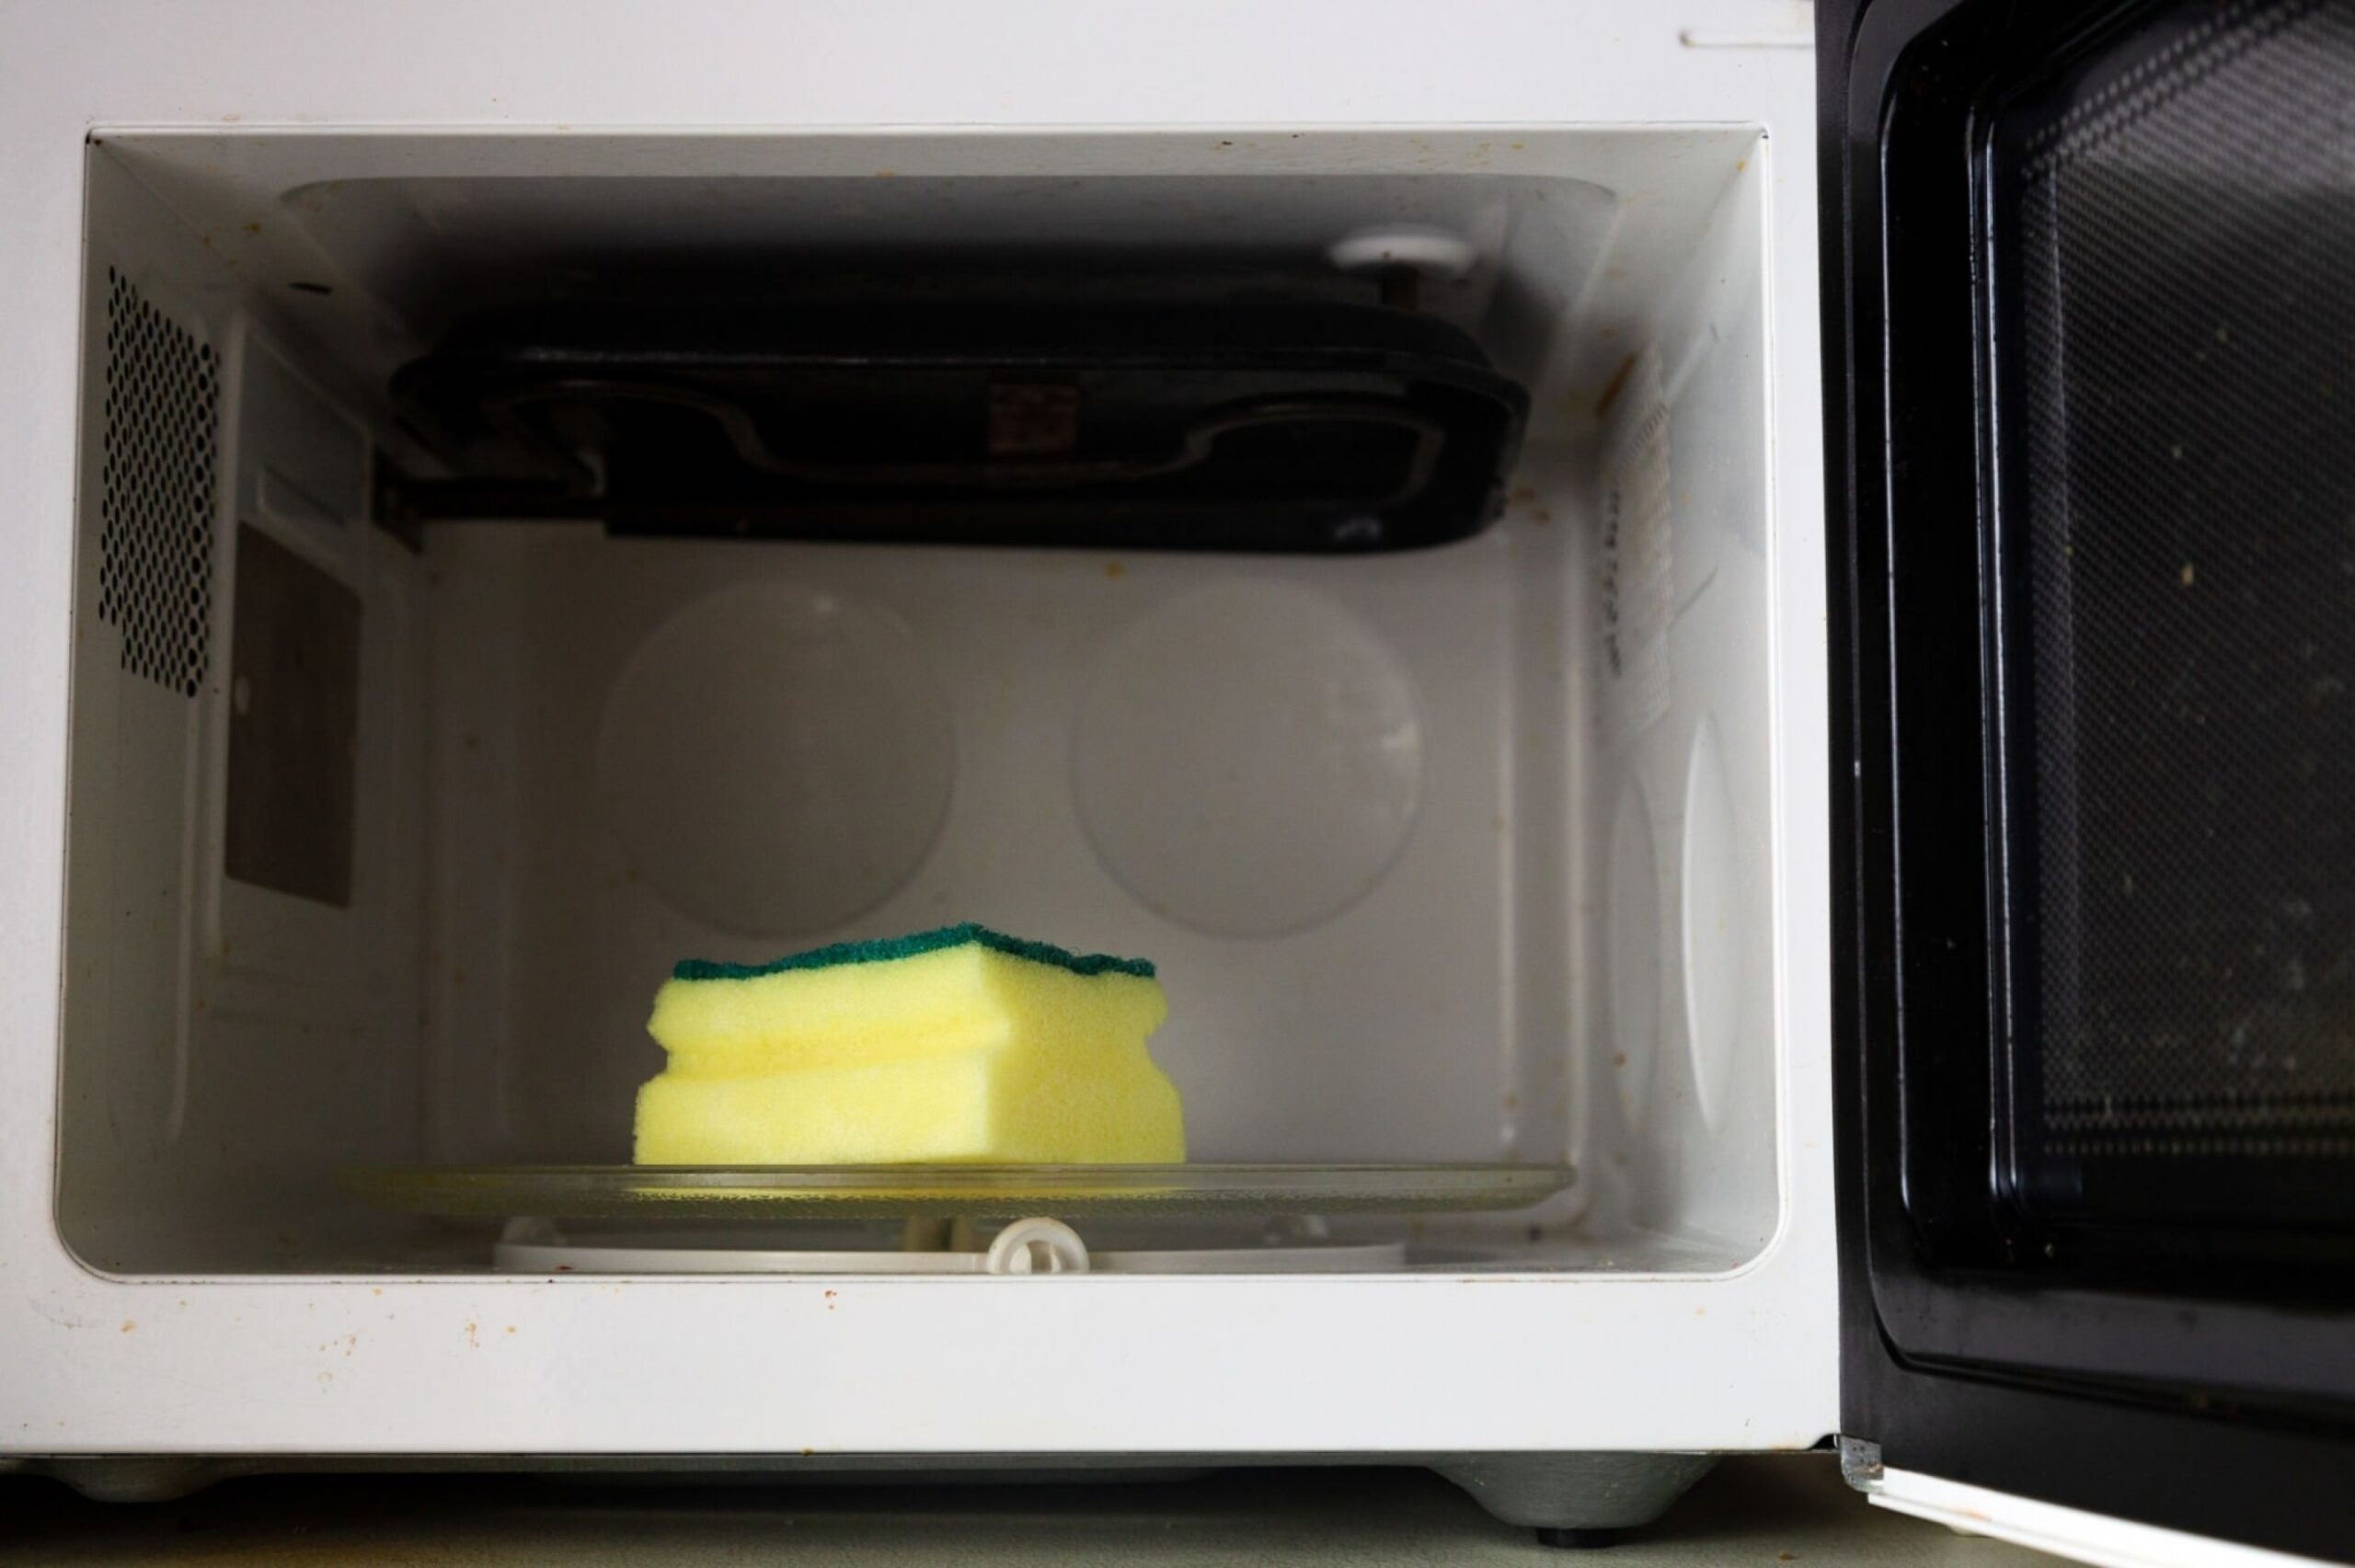
When you want to clean and disinfect your kitchen sponge, but maybe want to skip the chemicals in the process, turn to your microwave. Heat alone can kill more bacteria than you might think, so here’s how to do it:
- Thoroughly and completely soak your kitchen sponge in warm water. Never put a dry sponge in the microwave, this is an easy way to start a fire!
- Place the wet sponge either on a plate, or in another shallow container with a small amount of water.
- Set your microwave timer for 5 minutes and start microwaving the sponge.
- Once the microwave has finished, take the sponge out and allow it to cool for 10 to 15 minutes.
- Once cool, wring out your sponge and allow it to dry before putting it to use again.
4. Dishwasher
Another kitchen appliance you can use to make sure you sponge is deep cleaned and sanitized is your dish washer. This is probably the most hands-off method of cleaning, so here’s how to put it to use:
- Before you start your next dishwashing load, place your kitchen sponge on the top rack of the dishwasher.
- Set your dishwasher to a long hot water cleaning cycle followed by a high-heat drying cycle.
- After the drying cycle has finished, open up the dishwasher and allow everything to cool, including the sponge. Once cool, make sure the sponge is completely dry before starting to use it around your kitchen again.
5. Boiling Water
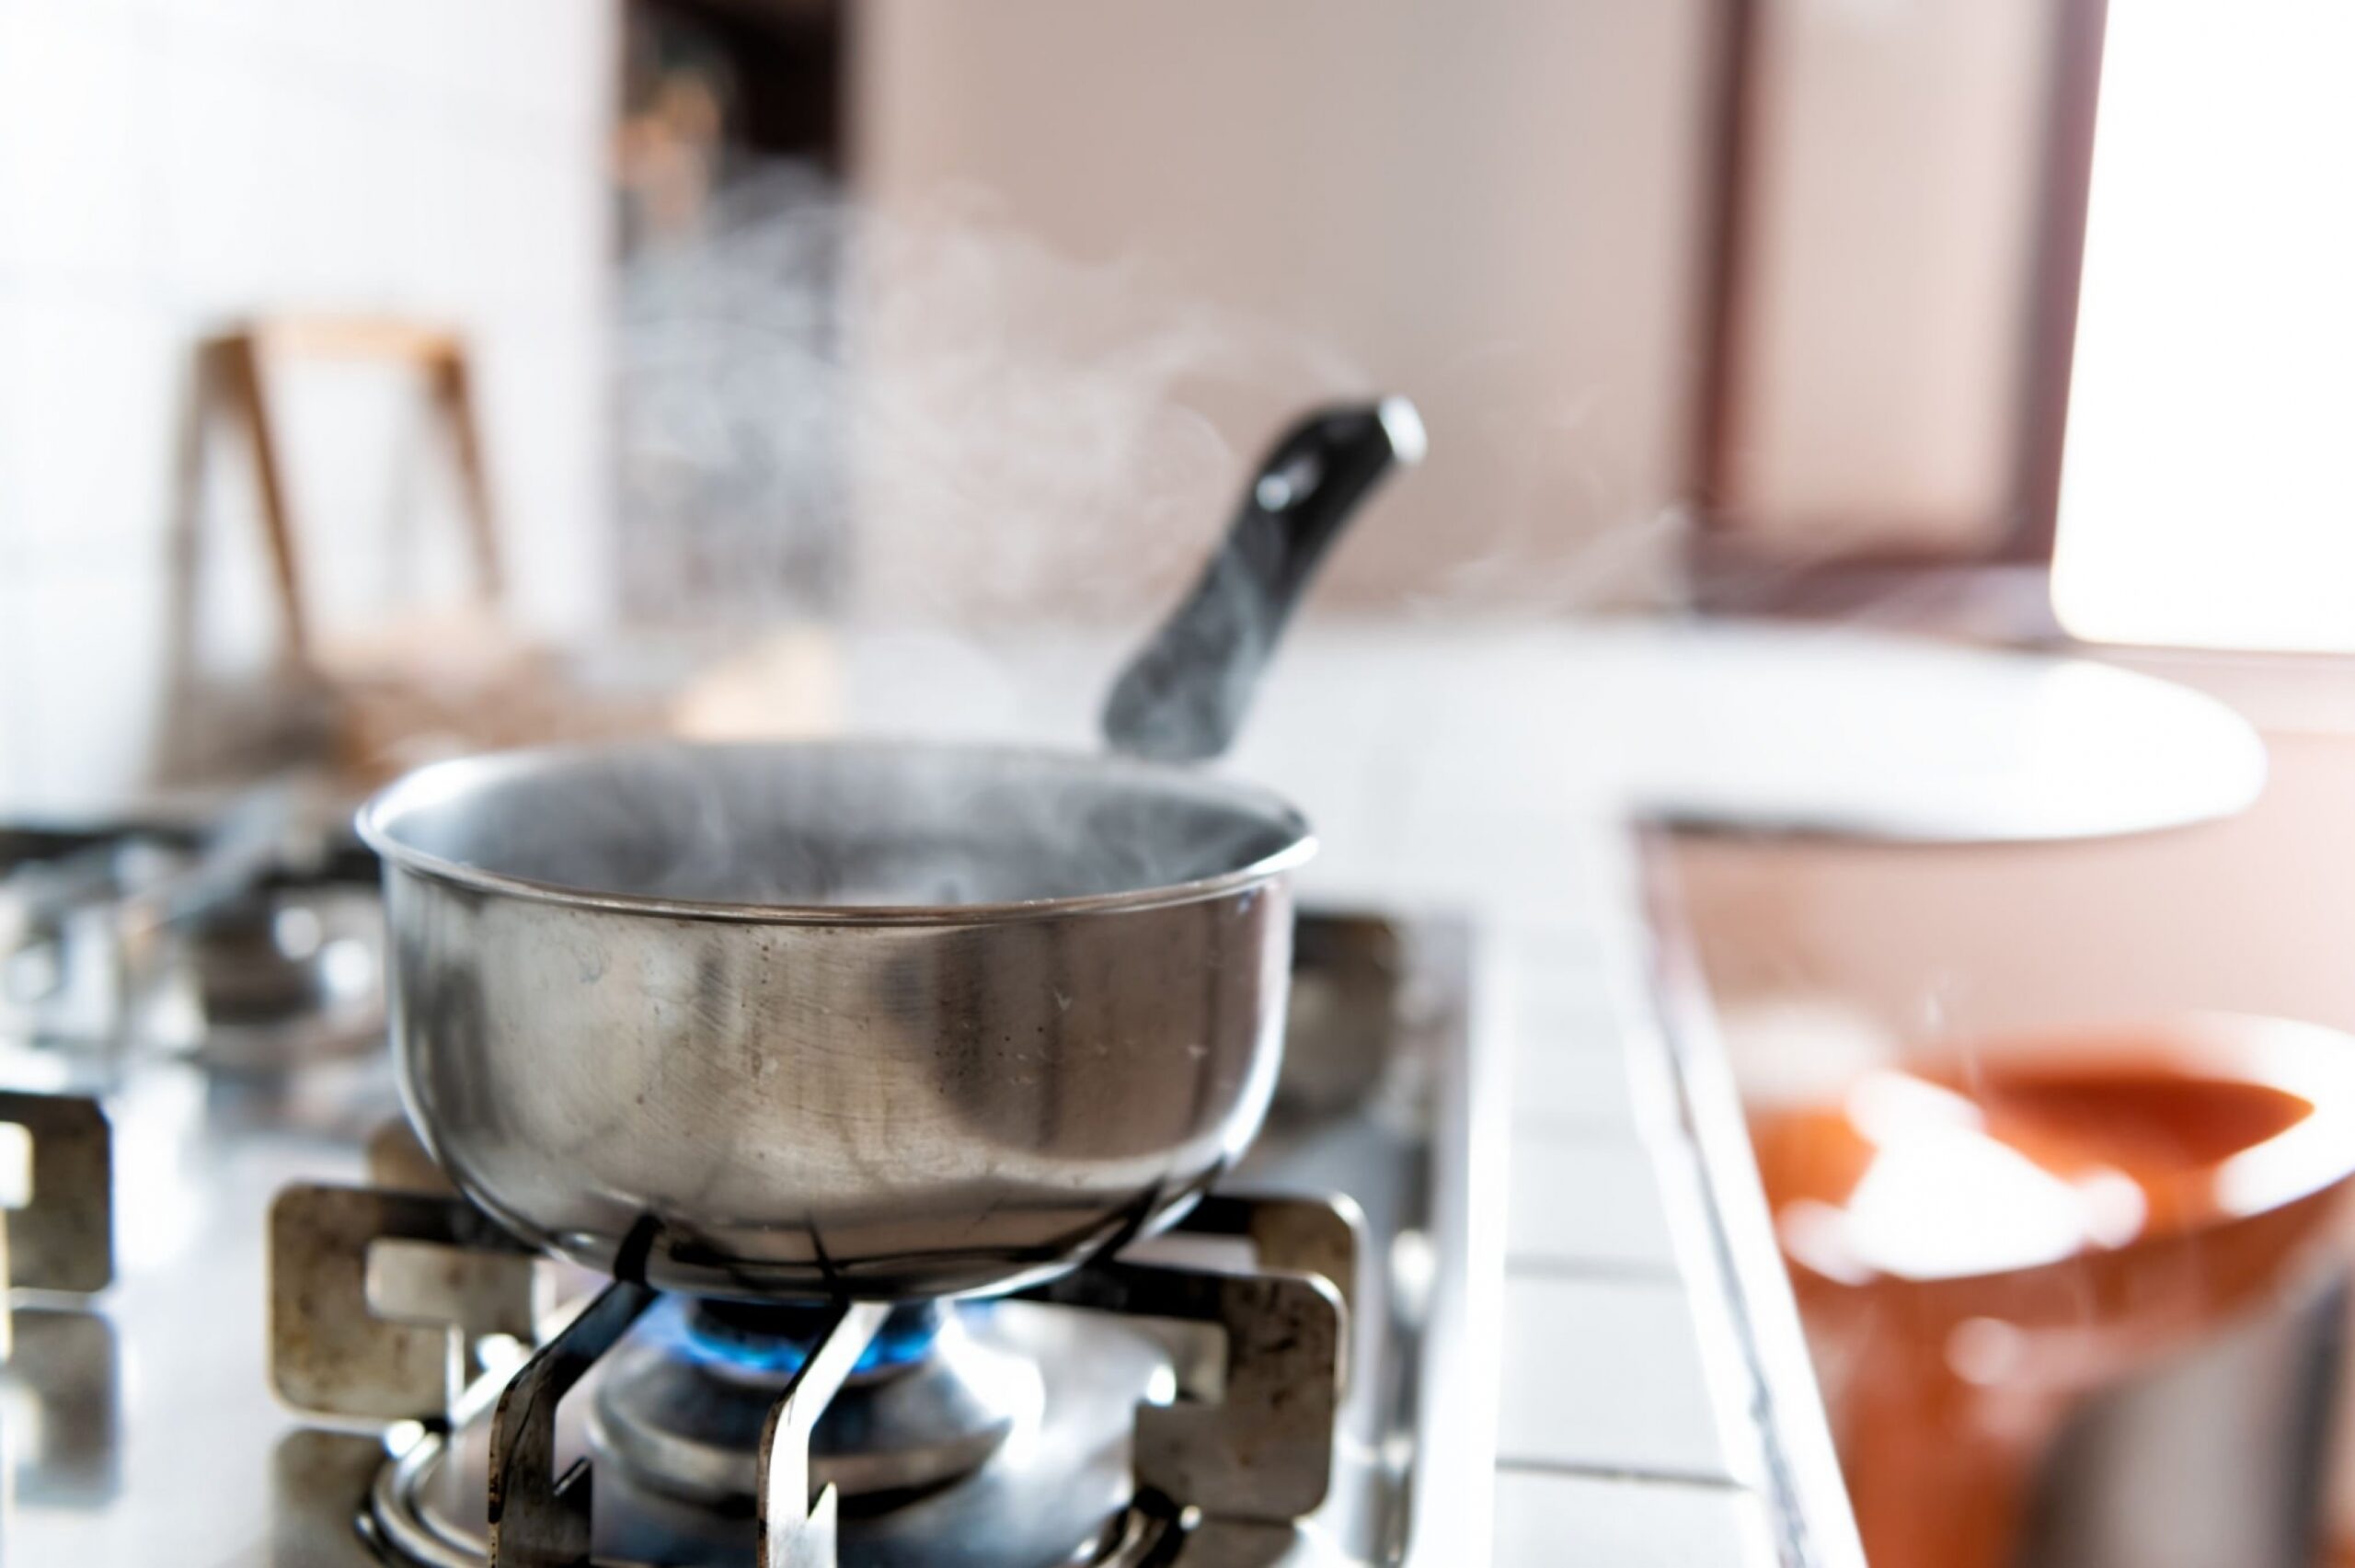
Need to clean and sanitize your kitchen sponge in a pinch? Here’s the easiest way to keep your sponge clean and sanitized for regular use:
- Fill a pot with water and set it on the stove to boil.
- Once the water has started to boil, place your sponge in the pot and allow it to boil with the water for about 5 minutes.
- After you’ve allowed the sponge to heat up and boil in the water, turn off your stove’s burner and give the water time to cool.
- When both the water and the sponge have cooled, take the sponge out of the water and wring it out. Allow the sponge to fully dry before using it again.
Tips & Tricks
No matter what method you decide to use to clean and disinfect your kitchen sponge, there are a few other things to keep in mind. Here’s what you should remember:
- Kitchen sponges should be cleaned at least once a week and sanitized almost everyday, but they should also be replaced monthly when used regularly.
- If your sponge has a metallic abrasive, do not place it in the microwave to clean or sanitize it. This can and will cause a fire within the microwave.
- When using your sponge, try to avoid cleaning anything except your dishes with it. Using it around the kitchen as more than a dishwashing utensil can actually spread more germs and bacteria around the room. Instead of using your kitchen sponge to clean up and catch messes around the house, we highly recommend having a few spare microfiber cloths among your arsenal of cleaning supplies.
FAQs
How often should a sponge be cleaned and disinfected?
Kitchen sponges should be cleaned and disinfected at least once every week in order to decrease and even stop the spread of germs and bacteria around the kitchen.
How do you prolong the life of a sponge?
You can easily prolong the life of your sponges by storing them properly and allowing them to fully air dry above and away from your sink and also make sure that you are keeping your sponge clean and sanitized between uses.
Can you reuse kitchen sponges?
You can clean, sanitize, and reuse your kitchen sponge for several weeks before replacing it. Once your kitchen sponge has reached its limit after 2 or 3 weeks of use, it is time to replace it.
Are there alternatives to a sponge?
Scrubbers made of materials like bamboo and silicon are very common and well-loved sponge alternatives. Many also swear by Swedish dishcloths and wooden dish brushes.
Remember that even with regular cleaning, you’ll still need to replace that grubby old sponge after a few weeks. When you keep up with the cleaning around your kitchen, you’ll be on your way to a healthier and happier home. Do you have any other tips and tricks to share when it comes to keeping your kitchen clean? Leave a comment below and tell everyone about it! We love hearing your stories and sharing them with others.
If you’re looking for some help around the house, we’ve got you covered. We’re proud to offer a variety of services for homes of every size. We even offer apartment cleaning services in Chicago so you know we’ll be able to help any home. Contact us today to find out exactly how we can help you keep your home looking its very best.
The post How to Properly Clean Your Kitchen Sponge appeared first on Cleanzen.
from Cleanzen https://cleanzen.com/blog/how-to-clean-kitchen-sponge/
via IFTTT
from Cleanzen Cleaning Services https://cleanzencleaningservices0.blogspot.com/2023/04/how-to-properly-clean-your-kitchen.html
via IFTTT
from
https://cleanzencleaningservices0.wordpress.com/2023/04/12/how-to-properly-clean-your-kitchen-sponge/


No comments:
Post a Comment